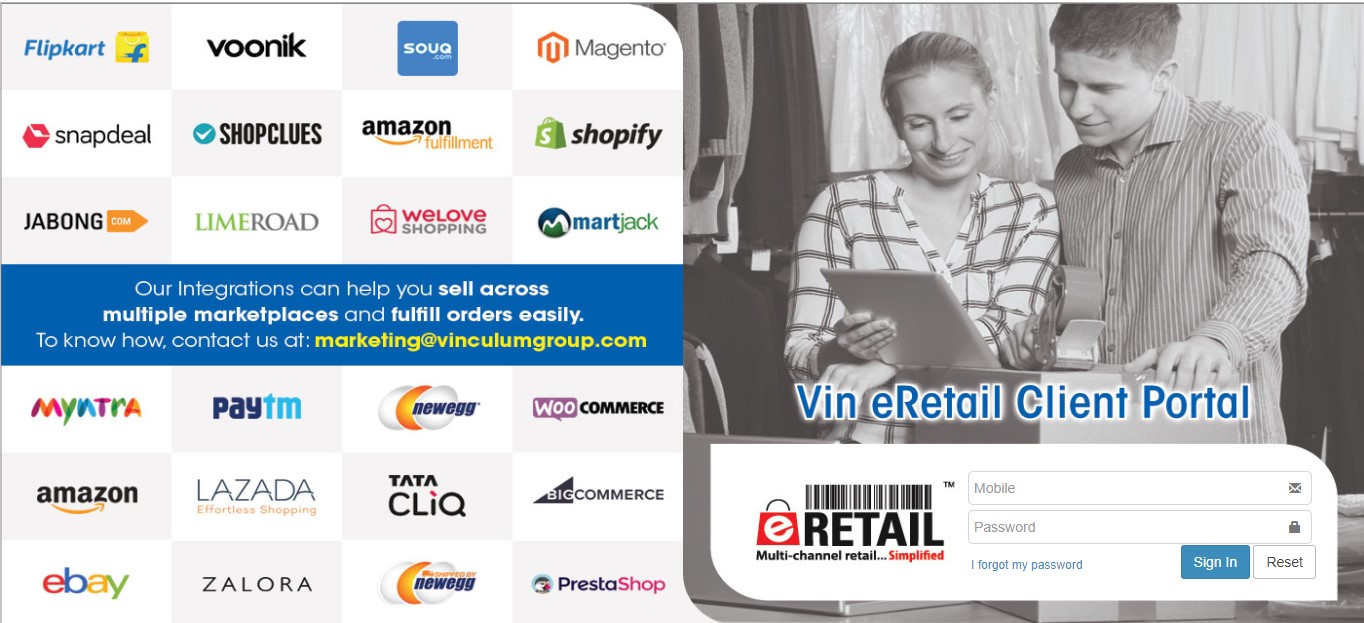
Vin eRetail’s Client Portal is the process that works in an multi client system where our customers lets say 3PLs provide access of a portal to their clients to view and manage details like customers, orders, purchase orders and much more.
Lets Understand this in details:
The Client Portal is primarily divided into six sections:
1. Master
2. Order
3. Purchase Order
4. Product
5. ASN
1. MASTER
Master data setup helps to configure your Masters related to trading partners based on which the future transactions will run.
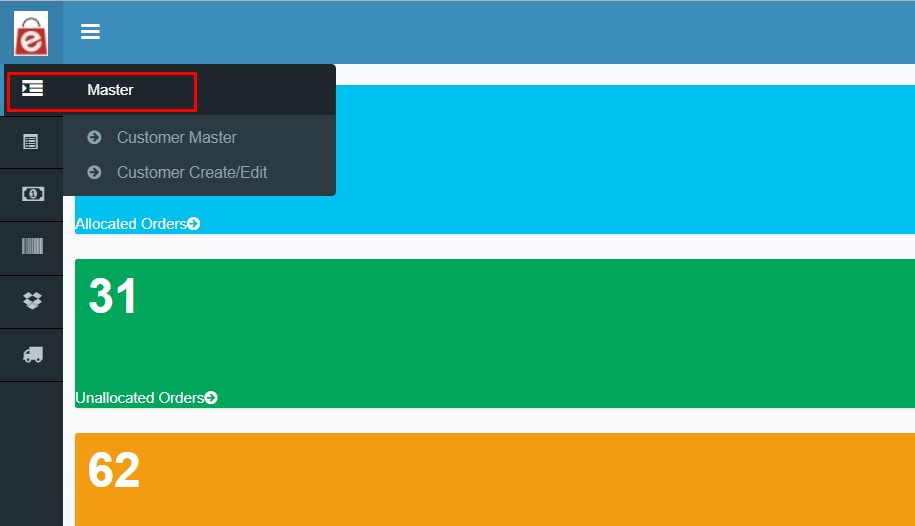
The user can view, enquiry and create the customers from the Masters –> Customer Master.
The masters section is divided into two parts:
1.1 Customers Master
1.2 Customer Create/edit
1.1 Customers Master
- This section will enable user to inquire and search an already existing customers and customer details. User can refine the search further by using filters as per requirement/s.
- User can take a download/export all the data present on Enquiry screen at any point of time
Navigation
Masters –> Customer Master
Below are the fields on the basis of which user can search their customers:
Customer Code: Customer Code is the unique code provided by the system to each customer and helps differentiating 2 or more records. Once customer is saved, customer code becomes un-editable.
Customer Name: User given name to the Vendor with which he is registering in the system.
Vendor Names can be identical and hence we require the vendor codes to differentiate.
Type: Customer Type here in drop down will be the type of customer categories created in the database by the user. For example: B2B type, B2C, any other type etc.
Status: User can filter based on Active and Inactive Customer status. Only the active customers with activated transactions will be displayed on selecting active as an option and vice versa.
Primary Contact & Primary Email: User will have to enter the primary contact & email id of the customer as contact detail.
Created Date: Filter the customers based on the date of creation.
Action Button
1.Search: Clicking on the search button without entering any filter criterion will populate the list of all the Customers based on default filter setting. User can further narrow down the search by using filter options to get any specific information.
2. Reset:Reset button will refresh the filter fields to default settings, i.e. to an initial state to start fresh search.
3. Download: To download the filtered or searched result in CSV format which is displayed in the data grid.
4. Add New: To add a new Customer to the database.
1.2 Customer Create/ Edit
To create a new Customer or to edit/update an existing one.
It is divided into three tabs:
1.2.1 Customer Details
1.2.2 Address
1.2.3 Other Shipping Address
1.2.4 UDF
Navigation:
Masters —- > Customer Master —-> Add New
1.2.1 Customer Details
Customer Code: Customer Code is the unique code provided by the user to each customer and helps differentiating two or more records. Once customer is saved, customer code becomes un-editable.
Customer Name*: Name of the customer could be similar with one another, that is why we have codes to differ the customers with same name.
Is Active: Check this to mark a customer as active one and vice versa.
Parent Customer: Parent customer is the primary customer who can further have the customers within itself.
Ext Customer Code: External Customer code is the code given in case where the customers are getting synced from a different platform/ or given by user.
Payment Terms: Payment terms could be the option of number of days to choose from for the payment settlement.
GL Code: GL code means the general ledger code to be entered. It is a set of numbered accounts a business uses to keep track of its financial transactions and to prepare financial reports
Tax Zone: State/city/county under which a particular vendor is registered becomes the tax zone for that Customer.
Type*: Customer Type here in drop down will be the type of customer categories created in the database by the user. For example: Marketplace type, B2B type, B2C type etc.
PAN No.: PAN number of the customer for financial recordings. For example: in India the pan card becomes mandatory for the Transactions above certain limit.
GST No.: GST no means the Goods & Service Tax Number GSTIN of the Vendor. This is for the B2B customers.
The fields marked with asterisk are the mandatory ones.
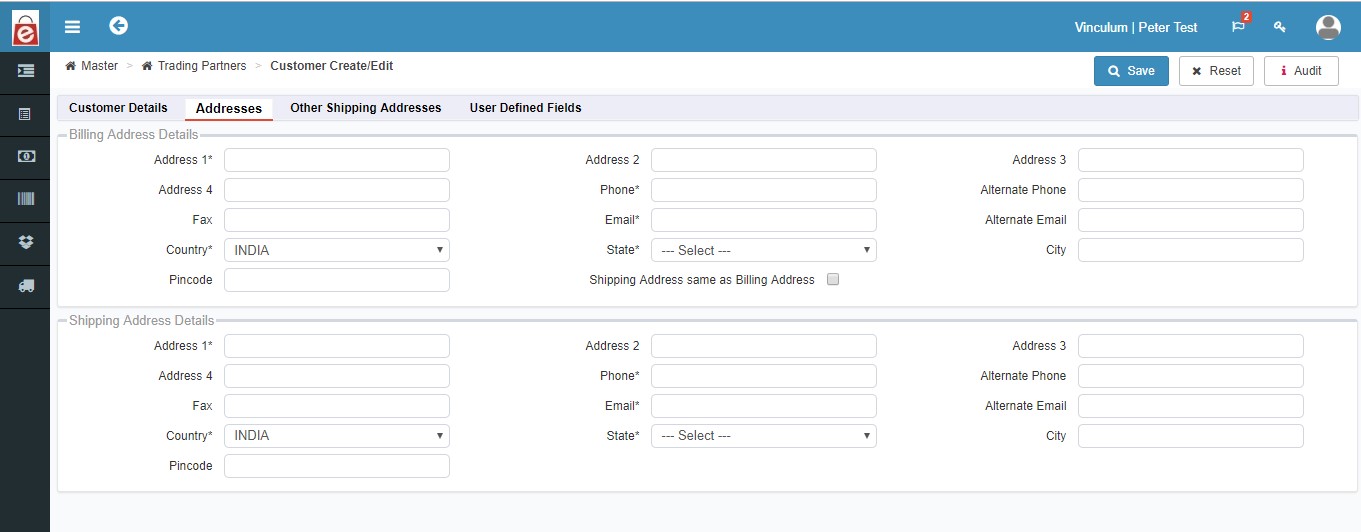
1.2.2 Address
Shipping Address Details & Billing Address Details
Customer’s full shipping and billing address required here in these tabs for the case of returns and other related activities.
The fields marked with asterisk are the mandatory ones.
- Address 1*
- Address 2*
- Address 3
- Contact Person*
- Phone*
- Email*
- Country*
- State*
- City
- Pin Code*
1.2.3 Other Shipping Address
From here user can add other shipping addresses as well. Refer the video below:
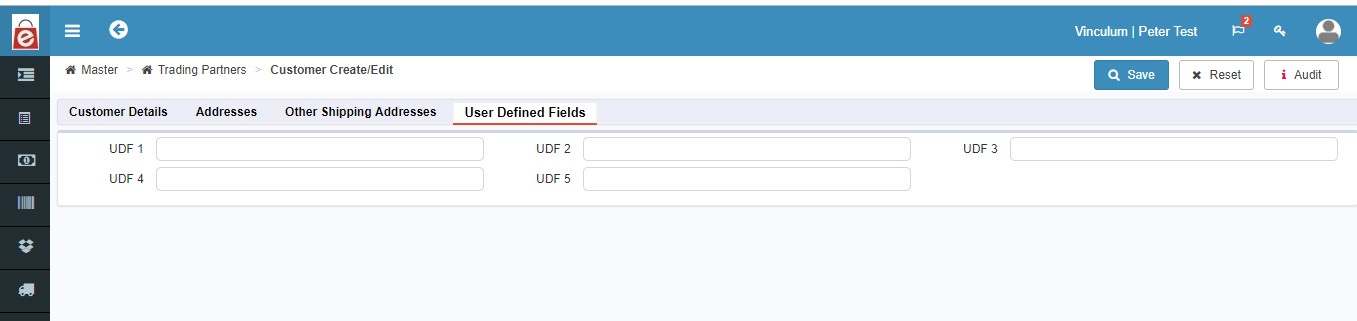
1.2.4 UDF
User Defined Fields: These are the custom fields which can be created by the User for customers in case of any extra information required.
2. ORDER
Order Section enables the user to configure your Sales Channels, managing & adding the new sales channels with respect to the already integrated marketplaces and order enquiry, order creation & much more.
UTILITY
Sales section enables user to target business on various sales channels.
Enables user to configure, pull, manage orders and much more after creating the sales channel.
Listing and Description
2.1 Manage Channels
2.2 Manage Order
2.3 Order Import
2.1 Manage Channels
2.1.1 Overview
Manage channel enables the user to view listing of all the channels created (active or inactive) and add any new sales channel.
It also enables the user to search the existing sales channels on the basis of the channel code and channel name.
Navigation
Orders –> Manage Channels
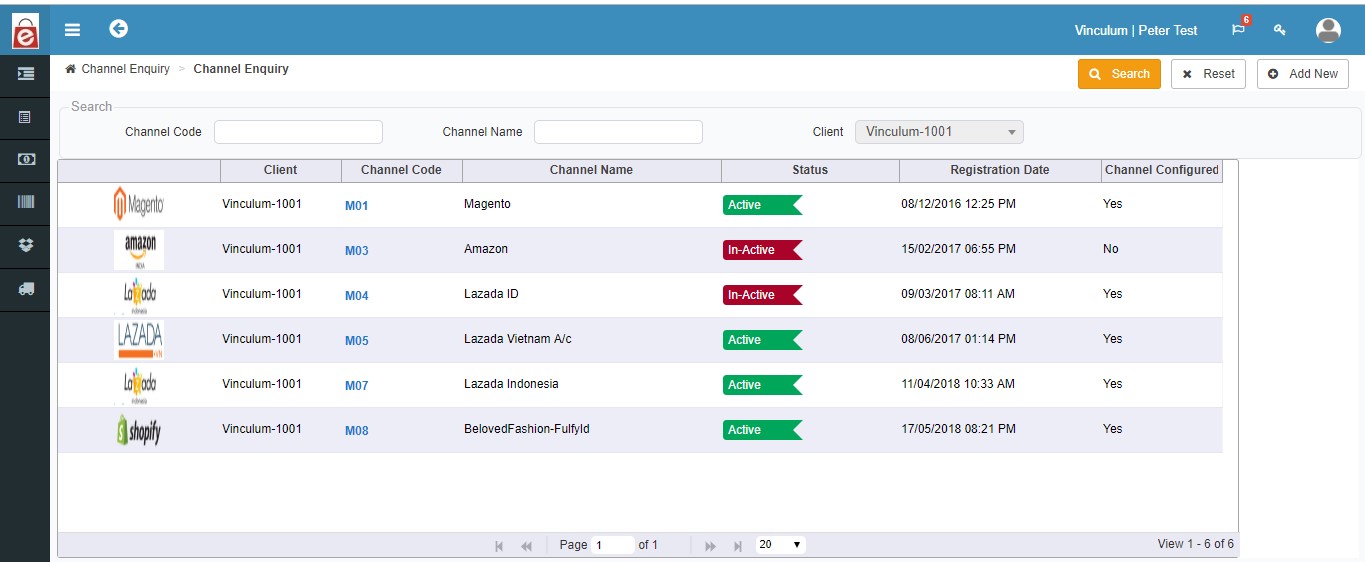
Fields on the basis of which the sales channel can be searched:
- Channel Code
- Channel Name
Channel Code: Channel code is the auto generated unique code by the system for each channel.
Channel Name: Channel name is the name given by the user to the channel while creating the channel.
Action Button
1. Search: Clicking on the search button without entering any filter criterion will populate the list of all the sales channel whether active or inactive. User can further narrow down the search by using filter options: Channel code and channel name.
2. Reset: Reset button will refresh the filter fields to default settings, i.e. to an initial state to start fresh search.
4. Add New: To add a new channel to the database. User will see the list of already added/integrated channels, selecting any one of those will enable user to add a new channel.
Further the Add channel is divided into 4 major sections.
*Master
*Order
*Channel SKU
*Inventory
Lets Understand these in detail.
Channel Detail
Channel Code: Channel code is the system generate unique ID given to the channel to differentiate these channels from one another.
Channel Name*: User will enter the name of the channel getting created.
Status: User will specify the channel’s state as active or inactive by selecting from the dropdown.
Order Fulfillment WH*: User will choose order fulfillment warehouse from the list of warehouses given.
Auto Range SKU: Auto range SKU enables the user to configure that with a particular channel location whether the SKU’s will be getting Automatically mapped/synced or not. Based on the requirement the user can select yes or no from the option.
Configure Interface: User can configure the API from here by entering the details here.
Channel SLA(in hrs)*: This is the service level agreement between the channel and the user. Here various aspects of the service – quality, availability, responsibilities – are agreed between the service provider and the service user.
Orders Enquiry
Order Sync*:User can choose to sync the order from the channel to eRetail by managing this option.
Order Sync From Date*: Order Sync action can be performed by the user by choosing the from date and from that till present’s period order will get sync.
Order Sync From Order No*: Order Sync action can be performed by the user by choosing the order number and from that order number till present’s period order numbers will get sync.
Shipping By: User can configure from here that the shipping will be done by the marketplace or by the seller.
Bill To Party & Its Master*: User gets the option to choose the billing party in case of multiple parties. These bill to party options can be created or managed from the
Masters — > Other Master — >Channel Configuration –> Bill to Party Tab.
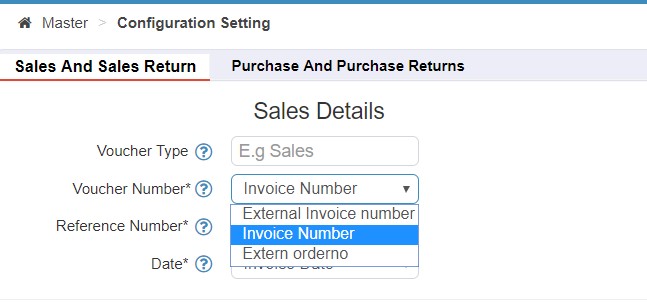
Invoice No By: User will choose that the Invoice no will get generated by the user or by the channel.
PrePack Enabled: User can enable prepack for the order from here.
Mark ReadyToShip At: User can choose to mark the status of ready to ship at any of the two events :
-at Manifest
or
-at Pack
Each Qty Per Line: User can enable to sync the each quantity per line order.
International Invoice & Domestic Invoice: user can choose which format of invoice suits his requirement from here.
Channel Sku
Channel SKU Suffix & Prefix: User can put the different suffix and prefix on SKUs of different channels to differentiate them from one another.
SKU Sync: SKU Sync between Channel and eRetail can be done via PULL & PUSH.
User can choose Pull to Pull the SKU’s from the channel to eRetail panel.
And User can choose Push to send the SKU data or changes from eRetail to the channel.
-In SKU pull the user is given with two options:
Create
&
Moderate
CREATE: In create SKU pull, all the SKU will be pulled and created on the eRetail panel in order to get mapped.
&
MODERATE: In moderate SKU pull only the Product Id’s of other platform will get pulled and then mapped with the eRetail’s SKU Id’s.
Inventory
Inventory Sync:User will have to choose the option of Yes or No, in case he wants to enable or disable the inventory sync respectively.
Safety Stock: Safety stock is the stock kept by user to describe a level of extra stock that is maintained to mitigate risk of stockouts (shortfall in raw material or packaging) caused by uncertainties in supply and demand.
Sync Method: In Sync method, users can choose that whether they want to sync the inventories from all the Locations, or they want to sync from different selected or custom locations.
Channel Inventory percentage: User can define the safety stock in percentage of the total stock.
2.2 Manage Orders
Orders across all the channels are visible here on a common screen. User can enquire for all the order related information from here on the basis of various filters available to narrow down the search result.
All the orders from various vendors and channels will get displayed here, and the order can be confirmed, saved, allocated, shipped, put away from here.
User can quick ship the orders from here.
The order enquiry section consists of four sections:
2.2.1 All orders
2.2.2 Failed Orders
2.2.3 Cancel orders post Shipping
2.2.4 Pending MP Label Shipment

2.2.1 ALL ORDERS
User will select the ‘to’ & ‘from’ dates and all the orders of that date selection will appear. User can also narrow down the search of orders by using various filters available like Order number, External Order Number, channel, order type, status, order amount & much more.From the order listing user can choose the order and manage it completely by clicking on the order number.
Selecting any Order user can manage its
allocation,
can quick ship,
save & confirm the order,
can part pick the order,
can update Warehouse,
Can hold the Order,
can unallocated the order,
can cancel the order and much more.
Action Button
1. Search: Clicking on the search button without entering any filter criterion will populate the list of all the Orders. User can further narrow down the search by using various filter options like Order number, External Order Number, channel, order type, status, order amount etc.
2. Reset: Reset button will refresh the filter fields to default settings, i.e. to an initial state to start fresh search.
3. Export: To download and export the displayed search results in the form of CSV.
4. Advance Search: Advance search further improves the search results of Orders by providing more fields to filter from. Below fields get added for the advance search option of the order enquiry.
- External Order No
- Fulfilled By
- SKU Code
- Priority
- Discount Code
- Replacement
- Customer Email
- Customer Phone
- Delivery No/AWB NO
- Reference No
- Channel Type
- Add New: User will use this to add/create the new Order. User will have to fill in all the mandatory forms of each tab given to create the order.
Order creation consists of 08 tabs with separate forms in them.
List of tabs are:
a) Order Details
b) Address
c) UDF
d) Outbound Delivery
e) Activity & Remarks
f) Payment Detail
g) Order Tags
h) Gift Wrap
2.2.2 Failed Orders
User will select the ‘to’ & ‘from’ dates and all the orders that have not been synced or pulled of that date selection will appear. User can also narrow down the search of orders by using various filters available like Order number, External Order Number, channel, order type, status, order amount & much more.
From this section the failed orders can be pulled from FORCED PULL button.
2.2.3 Cancel Order Post Shipping
User will select the ‘to’ & ‘from’ dates for order and all the orders which are cancelled for that date selection will appear. User can also narrow down the search of orders by using various filters available like Order number, External Order Number, channel, order type, status, order amount & much more.
From this section the PUTAWAY for cancelled orders can be processed.
2.3 Order Import
Orders can be imported by the user from here. Refer the video clip below:
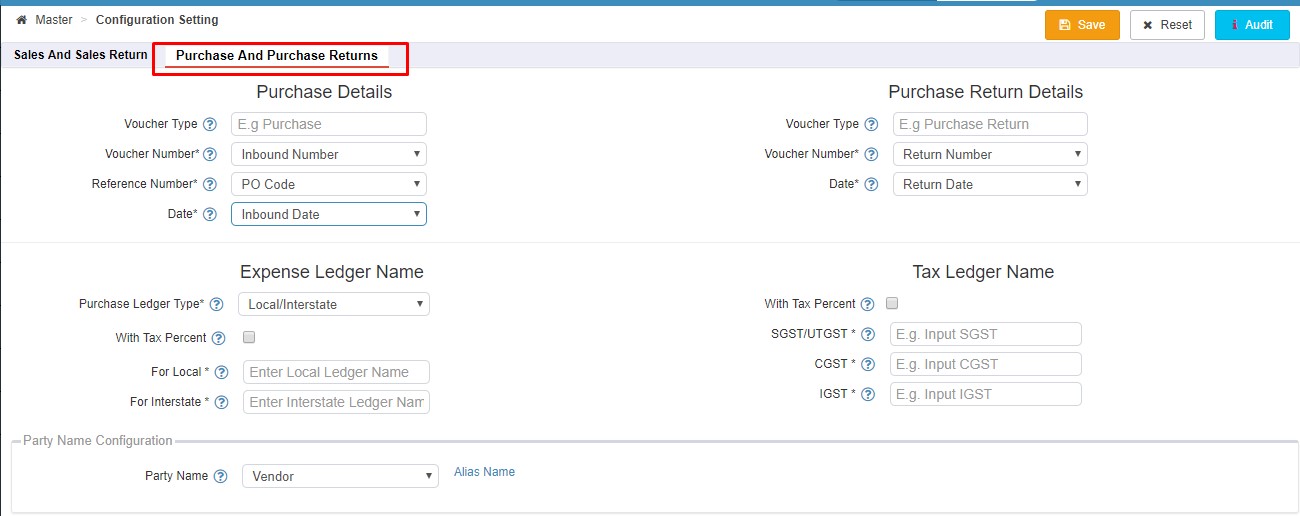
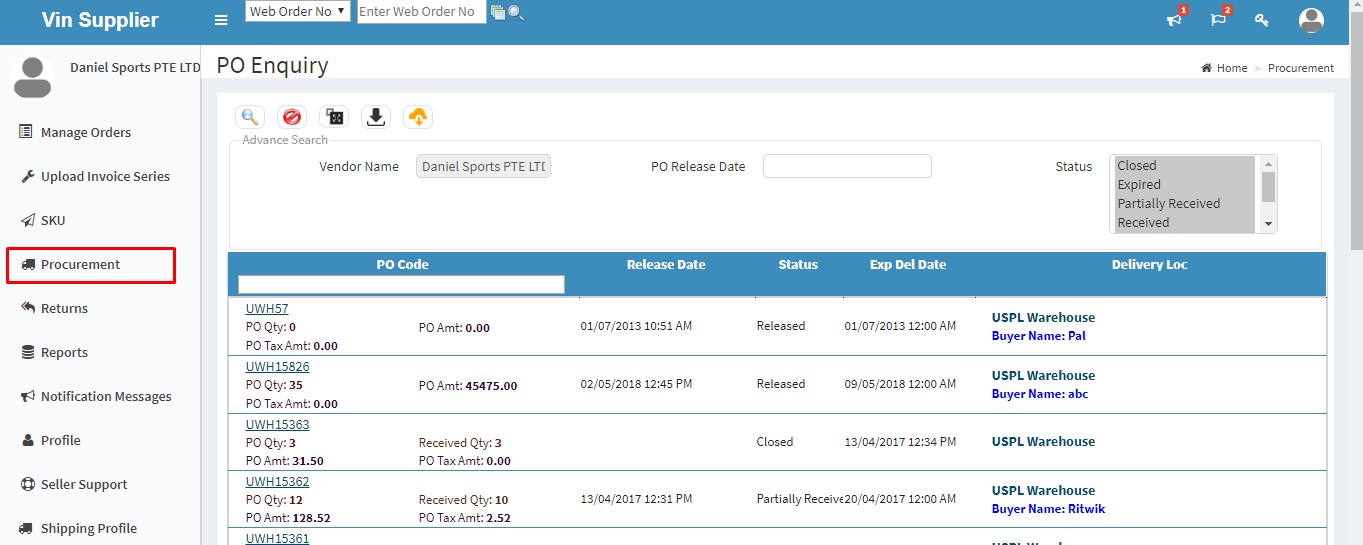
3. Purchase Order
Using this screen, one will be able to view existing POs and edit/update the same.
Utility
- User can see all the POs and even narrow down results by putting values in search option as well as advance search options
- User will be able to download results in a report format using Detail Export/ Download option
- Lets user to create a new PO using Add New option
Fields on the basis of which the POs can be searched:
PO Code: This is a system generated unique code which gets autogenerated when a new PO is created.
PO Date: User can see POs with respect to dates by filling this field.
Vendor: Helps to search all existing POs for that particular vendor.
PO type: If a user wants to see POs of a certain type, then he/she can use this field.
Status: User may narrow search using status of POs.
Delivery Location: User may filter POs based on delivery location.
Action Buttons:
- Search: Clicking on the search button without entering any filter criterion will populate the list of all the POs based on default filter setting. User can further narrow down the search by using filter options to get a specific information.
- Advanced Search: This button narrows the search results by adding more search criteria such as sku code, buyer code etc.
- Reset: Reset button will refresh the filter fields to default settings, i.e. to an initial state to start a fresh search.
- Download/ Detail Export: When user presses this button, user will be directed to Pending Report screen where user will be able to download report in the form of .csv file
- Print: This button enables user to print PO copy either specific to vendor or internal to user’s firm
- SKU is classified in four major categories: Normal, Bundled, Style (and Variant) and Prepack.
- The Stock for an SKU after the PO or inbound can be adjusted from the WMSà Inventory section.
- SKU’s once created and allotted to a specific bin can be changed afterwards from the SKU Lot Transfer
To create the PO for vendor, user will be required to add the SKU in it.Add New: To create a new PO click on the add new button.
4. PRODUCT
4.1 Manage Product
- This section will enable user to enquire and search an already existing SKU’s & its details.
- User can refine the search further by using filters as per requirement/s.
- User can take a download/export all the data present on Enquiry screen at any point of time
Navigation
Product –> SKU Enquiry
Utility
- Use enquiry screen to search for any SKU created in the system in past.
- SKU information is mandatory while creating Purchase Order from single location or back order
- SKU can be selected directly to create an RTV (Return to Vendor) in system.
- User can export SKU details in CSV format for the searched or filtered records using download option.
- Further improved enquiry results with Advance search option.
ACTION BUTTON
1.Search: Clicking on the search button without entering any filter criterion will populate the list of all the Transporters based on default filter setting. User can further narrow down the search by using filter options to get any specific information.
2. Reset: Reset button will refresh the filter fields to default settings, i.e. to an initial state to start fresh search.
3. Download: To download the filtered or searched result in CSV format which is displayed in the data grid.
5. Advance Search: Advance search further improves the search results of Transporter by providing more fields to filter from. Below fields get added for the advance search option of the Transporter.
- Site Location
- Approved Status
- Vendor Type
- SKU Source
4. Add New: To add a new SKU to the database.
This section will enable user to add new items into the system
Utility
On the SKU Create/Edit screen, below tabs are present to capture all vendor related information.
- SKU Details
- User Defined Field
- Other Detail
- Case Pack
- ARS Detail
SKU DETAIL
It is further divided into four sections.
-> Product Detail
-> Pricing Detail
-> Dimension Detail
-> SKU Image
SKU DETAIL section will consist of all the primary information related to the SKU.
SKU Code: Any unique code which a user gives to the SKU while creating it. This SKU code is a mandatory field and once created and saved cannot be changed and must be a unique number.
SKU Name & SKU Short Name: Enter the SKU name & Short name.
SKU Classification: SKU type out of the four types will be defined here initially when you click on create SKU button.
SKU Source: To mention the source of SKU here by selecting from the drop down whether it is a consignment product or an outright purchase.
Attribute Set-Size Group-Size-Color-Material: All these fields input values which appear in drop down are created & configured by user from the Other Masters of the Master section.
Primary UPC/EAN: UPC (Universal Product Code) or EAN (European Product Code) are the bar code for the SKU which will be entered here. Multiple barcodes can be supported by the single SKU.
Base UOM: UOM is the Unit of Measurement in which the SKU will be measured or weighed which is used in advanced Shipment Notice, Invoice, Purchase Order documents etc.
Pack Size: Pack size again is the field which is configured from the Other masters by the User defining the size of the SKU.
Hierarchy Code: Hierarchy code helps user to configure merchandising hierarchy for SKU from the list as they could be the sub category or sub-sub category of the SKU.
Primary Vendor: Every SKU in system is linked to a Primary vendor which is a mandatory field. There can be multiple other secondary vendors also linked to the same SKU.
Is Approved: Mention the status of the Vendor.
Country of Origin: Enter the country of origin of SKU by choosing from the down.
Pricing Detail
In this section below given pricing related details of the SKU will be entered.
- MSRP/MRP
- Sale Price
- Base Cost
- Std Margin %
- Tax Category
- SKU Level Tax
Dimension Detail
All the below given dimension criterion will be filled in w.r.t. to each SKU as this information is further required for the Shipping purposes.
Height (CM)
Length (CM)
Width (CM)
Cube
Weight (KG)
SKU Image
Image URL
Product Page URL
User Defined Field
These are the custom fields which can be created by the User for SKU in case of any extra information required.
C. Other Detail
Other Detail section is further divided into two sections:–
Detail 1: This section requires the user to input all the details of the product related to its shelf life and nature of the product w.r.t. shelf life. Below are the list of fields which needs to be filled or checked by the user in detail-1 section.
-
- Shelf Life
- Shelf Life Type
- Total Shelf Life
- Shelf Life on Receiving
- Shelf Life on Picking
- Serial Tracking
- Stackable
- Hazardous
- Poisonous
- Is Purchasable
- Is Saleable
- Is Stocked
– Detail 2: This section requires the user to input all the details of the product related to the SKU rotation and validation. Below is the list of fields which needs to be filled or checked by the user in detail-1 section.
- Lottable Validation
- SKU Rotation
- Rotate By
- Validation Code
- Picking Instructions
- Shipping Instructions
- Threshold Alert Required
- Threshold Qty
- Fulfillment Type
- Shipping Charges
- Handling Charges
- Def Source WH
- Is Unique barcodeCase Pack
Case packs are the packs where normal SKU is accumulated to be sold in one or more copies.Below are the list of fields which are required to be filled by user to enable case packs.
- UOM
- Barcode
- Case Size
- Is Purchasable
- Is Saleable
- Sale Price
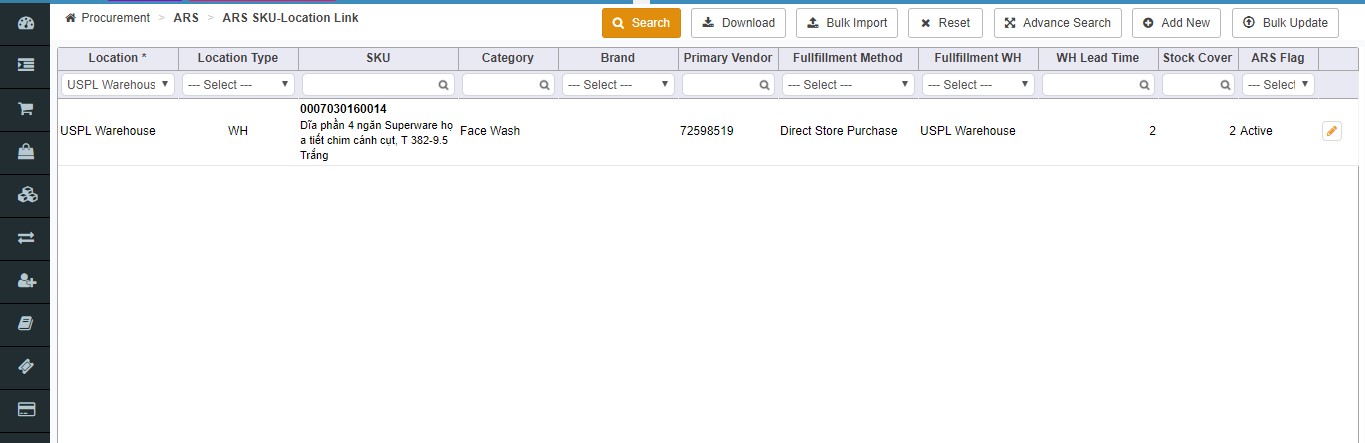
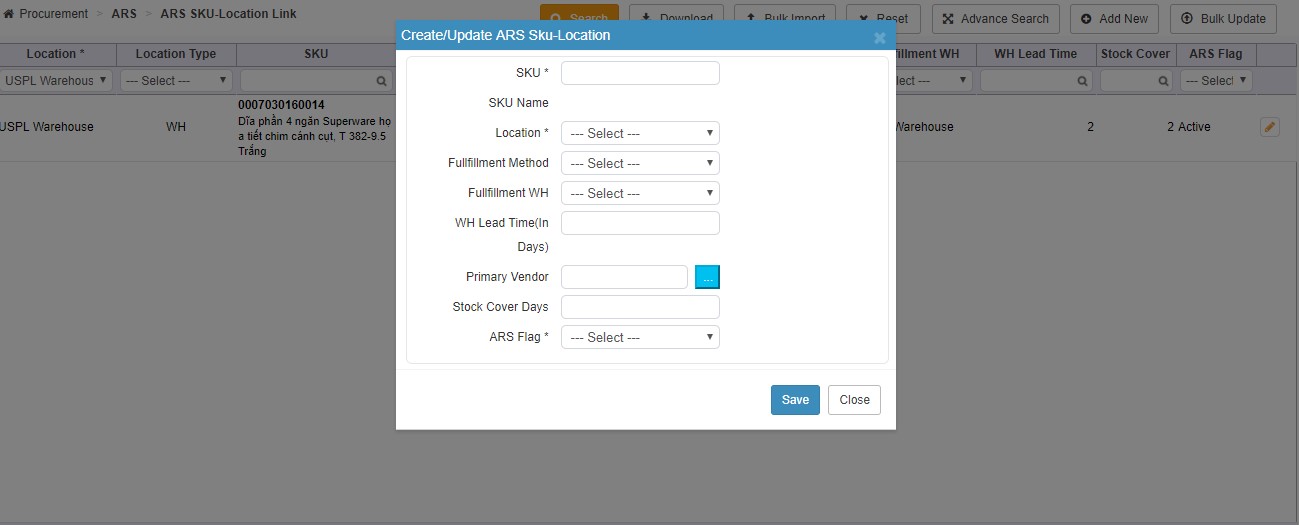
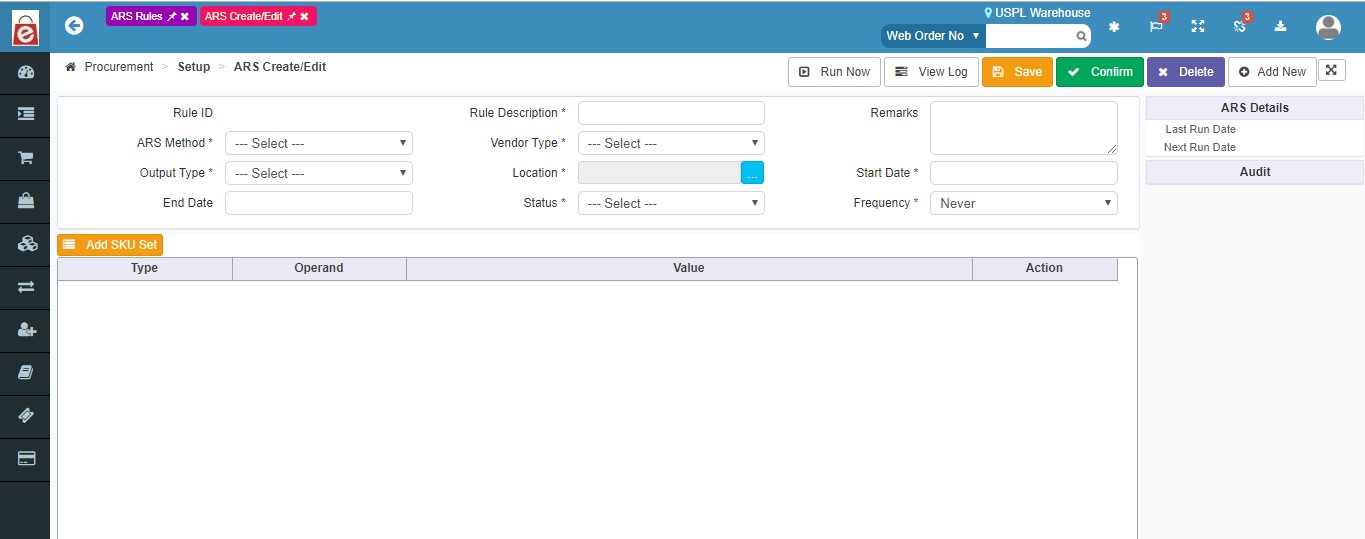
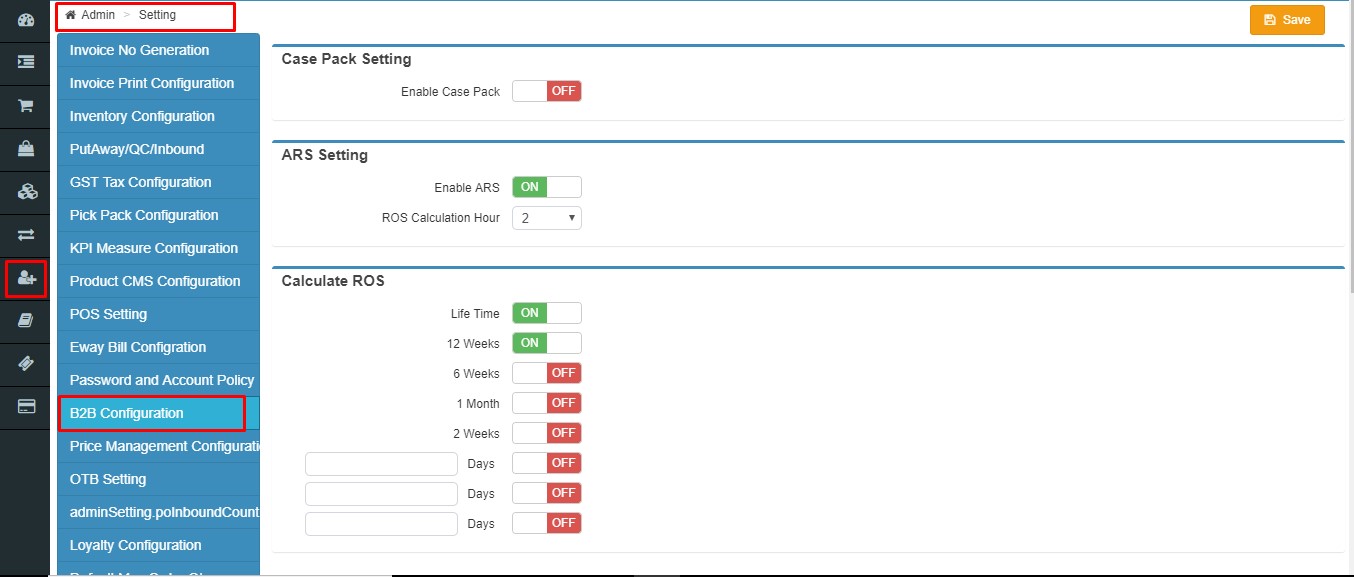
ARS Detail :ARS is Auto Replenishment System is used for automatic purchase order creation and auto-delivery of products directly. Hence forth in this tab you will be required to check the ARS required in case it is required and then mention the ARS method and stock details.
Below are the list of fields which needs to be filled or checked by the user in ARS Detail section.
- Is ARS Applicable? If User check this, the ARS will hold true. Which means that the stock will be automatically replenished based on stock setting and PO for the same will be raised automatically.
- Follow StyleUser will check this in case user requires the ARS to hold true for the style product.
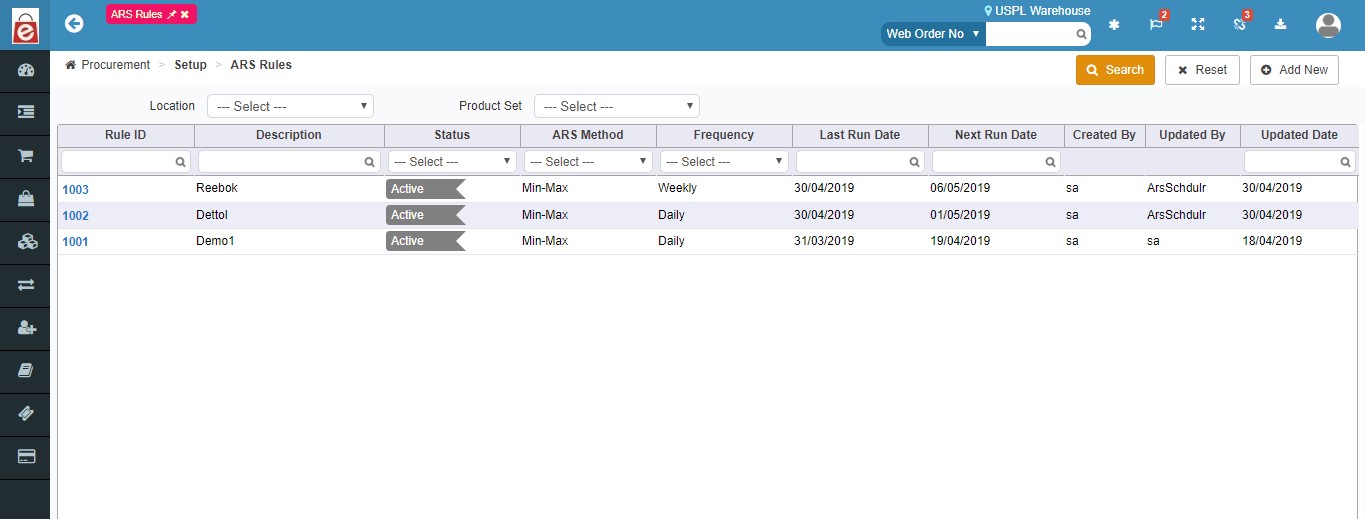
- Last ARS Run DateThis shows the last time when the Auto replenishment process was implemented.
- ARS Calculation MethodThere are two methods based on which the ARS is calculated.
If you choose FIXED from the drop down then you will enter the fixed stock value and when the stock will reach that value then a PO will automatically be generated for those SKU replenishments. & If user chooses FROM HISTORY from the drop-down option then based on sale’s history the system will automatically determine critical stock levels and raise a PO for model stock quantity.
- Fixed Stock: Fixed Stock is the stock that user enters and reaching that value the ARS process runs.
4.2 Inventory View
Inventory view section enables the user to view real time status of inventory present in the warehouse. It shows item wise inventory for each of the products like total stock in hand, Free stock or available quantity.
In inventory view section the inventory can be viewed or searched by SKU, by SKU Bin, by Description, by Mfg SKU code etc. Lets understand each in detail.
By SKU
Here user can get the inventory detail by searching the inventory by SKU based on below fields.
SKU Code
SKU Description
Mfg SKU Code
Hierarchy Code
Brand Code
Vendor Code
By SKU BIN
Here user can get the inventory detail by searching the inventory by SKU BIN based on below fields.
SKU Code
SKU Description
Mfg SKU Code
BIN
Inv Bucket
Zone
Subsequently the inventory can be searched based on below mentioned tabs and to narrow down the search the filter fields can be used in each tab.
By SKU LOT
By SKU BIN LOT
By SKU IMEI
By SKU UNIQUE NO
Market Place Inventory
By SKU BOM
Fields based on which the inventory move history can be searched:
SKU Code: Any unique code which a user gives to the SKU while creating it. This SKU code is a mandatory field and once created and saved cannot be changed and must be a unique number.
SKU Description: User can search or filter the inventory history based on the SKU description of each SKU.
Move date: Search or filter the inventory move history based on the move date.
Site Location: User can choose the warehouse location for which the user is enquiring about the inventory move history.
Move Quantity: Mention the move quantity.
From Zone to To Zone: User can view the inventory move history from zone and to zone.
From Bin & To Bin: User can view the history of inventory move from one bin to another.
Putaway Number: Inventory move history can also be searched or filtered based upon the putaway number.
Action Button
1.Search: Clicking on the search button without entering any filter criterion will populate the list of all the Inventory move history based on default filter setting. User can further narrow down the search by using filter options to get any specific information.
2. Reset: Reset button will refresh the filter fields to default settings, i.e. to an initial state to start fresh search.
3. Export: To download the filtered or searched result in CSV format which is displayed in the data grid.
4. Add New: To add a new Inventory Move to the database.
5. Advance Search: Advance search further improves the search results of Inventory move history by providing one more fields to filter from i.e. Style Code.
5. ASN [Advance Shipping Note]
Advance Shipping Notice (ASN) is a notification document having all the important information about a future delivery. The main purpose of the ASN is to provide a prior notice to the customer regarding the delivery so that customer can get prepared to accept the delivery. It notifies the customer when shipping occurs and provides physical characteristics like weight, dimension of the box etc. about the shipment.
Manage ASN
Using this screen, one will be able to view existing ASNs and edit/update the same.
- ASN No.: This is a system generated unique code which gets auto-generated when a new ASN is created.
- ASN. No.: This is a unique code given by user while creating the ASNs.
- ASN Date: User can see ASNs with respect to dates by filling this field.
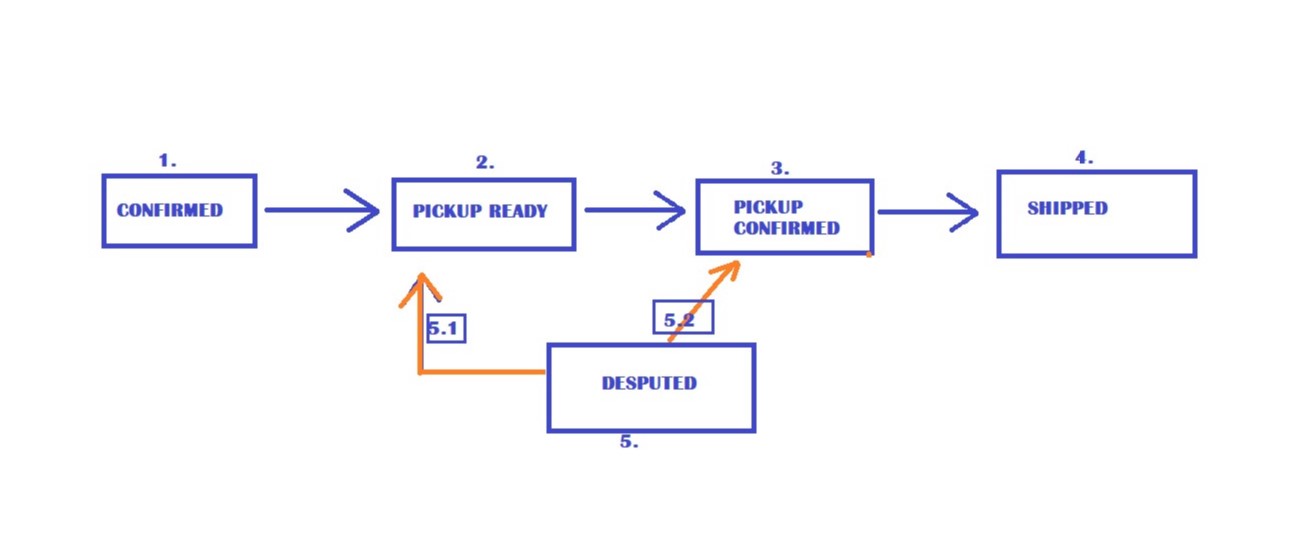
- Status: User may narrow search using status of ASNs. An ASN can be available in one of the below statuses:
Pending Confirmation – If an ASN is created and saved, then it goes into ‘Pending confirmation’ status.
Confirmed – If an ASN is created and clicked ‘Confirm’, then the ASN got created and status changes to ‘Confirmed’.
Part Received – If ASN is not fulfilled completely i.e. some items were received not all, then ASN status will be ‘Part received’.
Closed – If all the items in an ASN is received completely, then ASN status becomes ‘Closed’.
Cancelled – If user cancels the ASN in any stage of the process, then ASN status moves to ‘Cancelled’.
- Vendor: While creating PO, vendor name is necessary. So, a user can view ASNs with respect to a vendor by filling this field.
- Customer: While creating PO, Customer name is necessary. So, a user can view ASNs with respect to a Customer by filling this field.
- Delivery Location: User may filter records using delivery location.
Action Buttons in the screen are listed below:
- Search: Clicking on the search button without entering any filter criterion will populate the list of all the ASNs based on default filter setting. User can further narrow down the search by using filter options to get a specific information.
- Advanced Search: This button narrows the search results by adding more search criteria such as SKU, Reference No. etc.
- Reset: Reset button will refresh the filter fields to default settings, i.e. to an initial state to start a fresh search.
- Export: Upon clicking this button, pending reports will open where you will be able to download search results in .csv format.
- Add new: To add a new ASN click on the add new button.